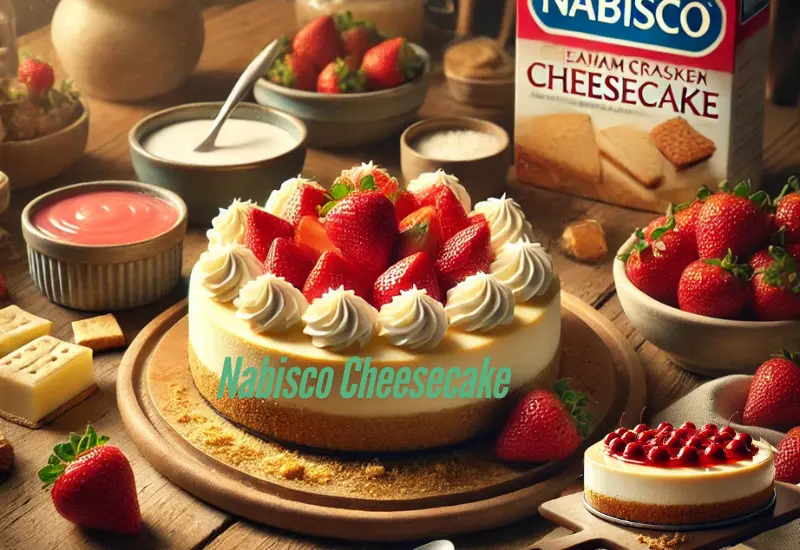
If you’re a cheesecake lover (like me!), you’re in for a real treat today.
This Nabisco Cheesecake Recipe is my go-to dessert when I want something that’s rich, creamy, and impressively easy to make.
It’s perfect for birthdays, potlucks, or just because you deserve something sweet.
The magic? The buttery graham cracker crust made with Nabisco graham crackers.
Let’s dive into this foolproof recipe that delivers bakery-quality results from the comfort of your kitchen!
How To Prepare Nabisco Cheesecake Recipe?
Recipe Overview
This Nabisco Cheesecake Recipe combines a classic graham cracker crust with a velvety cream cheese filling and optional fruity toppings.
You only need a few simple ingredients to create this luscious dessert that’s guaranteed to wow your taste buds.
- Prep Time: 20 minutes
- Cook Time: 55 minutes
- Total Time: 1 hour 15 minutes
- Cuisine: American
- Course: Dessert
- Difficulty Level: Easy
- Yield: 8-10 servings
- Calories: ~325 per serving
Ingredients
Crust
- 1 ¾ cups Nabisco graham cracker crumbs
- ⅓ cup butter, melted
- ¼ cup sugar
Filling
- 3 (8 oz.) pkgs. cream cheese, softened
- 3 large eggs
- 1 cup sugar
- 2 tsp vanilla extract
- 1 cup sour cream
Optional Toppings
- 21 oz. can cherry or blueberry pie filling
- Fresh strawberries

Instructions
Step 1: Prepare the Crust
- Preheat your oven to 325°F (163°C).
- In a mixing bowl, combine the Nabisco graham cracker crumbs, melted butter, and sugar. Mix until the texture resembles wet sand.
- Press the mixture evenly into the bottom of a 9-inch springform pan. Use the back of a spoon or a flat-bottomed glass for even packing.
- Bake the crust for 8-10 minutes. Remove from the oven and let it cool.
Step 2: Make the Filling
- In a large bowl, beat the softened cream cheese with a hand mixer or stand mixer until smooth and creamy (no lumps allowed!).
- Add the sugar and vanilla extract, mixing until fully incorporated.
- Add the eggs, one at a time, mixing on low speed to avoid overbeating.
- Fold in the sour cream gently with a spatula for an extra creamy texture.
Step 3: Assemble and Bake
- Pour the cream cheese mixture over the cooled crust. Smooth the top with a spatula.
- Bake for 50-55 minutes or until the center is just set and slightly jiggly.
- Turn off the oven, crack the door open, and let the cheesecake cool inside for about an hour (this helps prevent cracks).
- Once cooled, refrigerate for at least 4 hours or overnight for best results.
Step 4: Add Toppings
- Before serving, top your cheesecake with cherry or blueberry pie filling or arrange fresh strawberries on top.
Tips and Variations
Tips
✔ Room Temperature Ingredients: Make sure your cream cheese and eggs are at room temperature for a smoother filling.
✔ Avoid Overmixing: Overbeating the batter can incorporate too much air, causing cracks.
✔ Water Bath? Not Necessary! This recipe avoids the hassle of a water bath while still delivering a creamy texture.
Variations
❖ No-Bake Version: Skip the eggs and bake time. Just chill the crust and filling for at least 6 hours before adding toppings.
❖ Mini Cheesecakes: Divide the crust and filling into muffin tins lined with cupcake wrappers for individual portions.
Storage
➤ Store leftovers in an airtight container in the refrigerator for up to 5 days.
➤ Freeze slices by wrapping them individually in plastic wrap, then foil. They’ll keep for up to 3 months!
Serving Suggestions
Pair this cheesecake with:
- A dollop of whipped cream
- A drizzle of chocolate or caramel sauce
- Fresh mint leaves for garnish
FAQ
Can You Use Kikkoman Teriyaki Marinade as a Sauce?
Yes! The savory-sweet balance makes Kikkoman Teriyaki Marinade perfect as a sauce for glazing grilled meats or veggies.
What Are the Ingredients in Kikkoman Teriyaki Marinade?
It’s a mix of soy sauce, sugar, water, vinegar, and spices, creating a blend that’s rich in umami.
Is Kikkoman Teriyaki Sauce Ready to Eat?
Absolutely! You can use it straight from the bottle as a marinade, dip, or glaze.
How to Use Kikkoman Teriyaki Glaze?
Brush it on meats or veggies during the last 10 minutes of cooking for a glossy, flavorful finish.
Conclusion
This Nabisco Cheesecake Recipe is as classic as it gets—easy to make, endlessly customizable, and absolutely delicious.
Whether you’re celebrating something special or simply craving cheesecake, this recipe will hit the spot.
Try it out, and let me know in the comments how it turned out for you. I love hearing from you!
Happy baking!
– Mary 😊

Nabisco Cheesecake Recipe
Ingredients
Crust
- 1 ¾ cups Nabisco graham cracker crumbs
- ⅓ cup butter melted
- ¼ cup sugar
Filling
- 3 8 oz. pkgs. cream cheese, softened
- 3 large eggs
- 1 cup sugar
- 2 tsp vanilla extract
- 1 cup sour cream
Optional Toppings
- 21 oz. can cherry or blueberry pie filling
- Fresh strawberries
Instructions
Step 1: Prepare the Crust
- Preheat your oven to 325°F (163°C).
- In a mixing bowl, combine the Nabisco graham cracker crumbs, melted butter, and sugar. Mix until the texture resembles wet sand.
- Press the mixture evenly into the bottom of a 9-inch springform pan. Use the back of a spoon or a flat-bottomed glass for even packing.
- Bake the crust for 8-10 minutes. Remove from the oven and let it cool.
Step 2: Make the Filling
- In a large bowl, beat the softened cream cheese with a hand mixer or stand mixer until smooth and creamy (no lumps allowed!).
- Add the sugar and vanilla extract, mixing until fully incorporated.
- Add the eggs, one at a time, mixing on low speed to avoid overbeating.
- Fold in the sour cream gently with a spatula for an extra creamy texture.
Step 3: Assemble and Bake
- Pour the cream cheese mixture over the cooled crust. Smooth the top with a spatula.
- Bake for 50-55 minutes or until the center is just set and slightly jiggly.
- Turn off the oven, crack the door open, and let the cheesecake cool inside for about an hour (this helps prevent cracks).
- Once cooled, refrigerate for at least 4 hours or overnight for best results.
Step 4: Add Toppings
- Before serving, top your cheesecake with cherry or blueberry pie filling or arrange fresh strawberries on top.

Hi, I’m Mary, and I’m a cake maker here at the Cakerecipehome.com blog. With a passion for all things sweet and a flair for creativity in the kitchen, I spent 5 years perfecting the art of cake making and decorating. Over the years, I’ve honed my skills through countless baking experiments, and I’m excited to share my knowledge and experience with you.
I love trying new recipes, especially when they’re delicious, I love them so much… hope you like them! Thanks for the time!
